

You will need:
- A small amount of cylinder beads in colours A (centre colour), B (main colour) and C (accent colour).
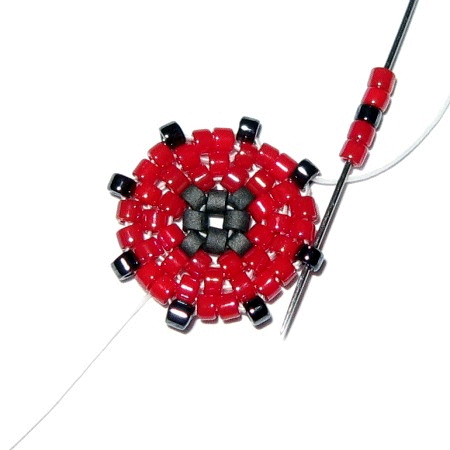
- A size 10/12 beading needle threaded with about half a metre of beading thread.
- Pair of earwires
- 2 x 4mm jump rings, thin enough to go through a cylinder bead.
- Pliers
How to make:
Pick up 4 A beads and sew through them all again plus one more to create a circle.
Pick up 1 A bead and sew through the next bead in the circle. Repeat another 3 times.

Step up at the end of the row by passing the needle through the first bead you added, ready for the next row...

Pick up 2 B beads and sew through the next bead. Repeat another 3 times.

Step up through the first bead you added...

Pick up 1 B bead and sew through the next bead. Repeat another 7 times. Some of the beads will be added between the pairs from the last row, as shown below...

Repeat the last row once more, picking up 1 B bead each time. Step up.
The key to this design is to keep the tension light. Don’t pull the thread too tight as this will cause the edge to curl!
Pick up 2 B beads and sew through the next bead. Repeat another 7 times and step up through 2 beads at the end.

Pick up 1 C bead and sew through the next 2 beads. Repeat another 7 times and step up.

Pick up 2 B beads, 1 C bead and 2 B beads and sew through the next C bead. Arrange the beads so that they form a triangle with the C bead at it’s tip. Repeat another 7 times.
Follow the thread path another couple of times to stiffen the points (if necessary) before weaving both ends of the thread into the beadwork and trimming. Open up a jump ring with your pliers and slide it through one of the cylinder beads on the points, add an earwire and close the jump ring to finish. Repeat to make a second earring.

Hope you have fun making these! Liz x
5 comments:
Thanks for sharing
Thanks so much for sharing this super cute tutorial! x
what great diagrams for a lovely tutorial!
wonderful liz. Thank you xxx
You're very welcome, I'm glad you like it! xxx
Post a Comment